


Microsoft Teams Room Setup Guide: How to Plan It Properly
A practical guide to choosing the right display, camera, microphone, speaker, touch console, booking panel and content-sharing setup before building a professional Microsoft Teams Room.

Microsoft Teams Rooms bring the familiar Teams meeting experience into a physical meeting space without relying on laptops, adaptors or inconsistent room setups.
The room has dedicated hardware for video, audio, display, control and content sharing. The challenge is choosing the correct hardware for the room rather than simply buying the most expensive kit.
This guide explains what should be decided before equipment is selected. For a complete installed system, start with ScreenMoove’s Microsoft Teams Room solutions.
What should you decide before planning a Microsoft Teams Room?
Before choosing Teams Room hardware, define how the room will be used, who will use it and what the meeting experience needs to feel like day to day.

The main parts of a Teams Room setup
A professional room brings several elements together. Each component needs to suit the room rather than being selected in isolation.

Display
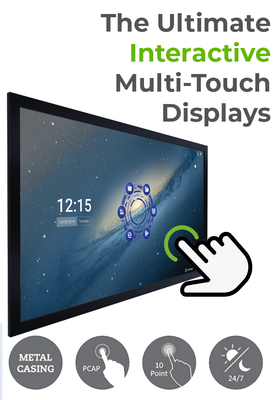
A commercial screen, interactive display or dual-display setup selected according to viewing distance and whether users need to see people and shared content at the same time.
Camera
An all-in-one video bar, PTZ camera or modular camera system chosen around room size, seating layout and required field of view.
Microphones
Table microphones, expandable microphones or ceiling arrays that allow every participant to be heard clearly.
Speakers
Integrated video-bar audio, dedicated speakers or ceiling speakers depending on room scale and acoustic requirements.
Touch console
The room controller used to join meetings, adjust volume, manage participants and share content without using a laptop.
Installation
Mounting, cabling, power, networking, configuration, commissioning and handover all affect how reliable the room feels.
Choose the camera around the room shape and seating position.

Use one or two screens depending on people, content and viewing distance.

Booking panels keep shared meeting spaces organised.

Support both in-room and remote participants with a simple workflow.
The real goal is a room people actually use
The best Teams Rooms are predictable. Users should be able to walk in, see the meeting on the console, tap to join and begin collaborating without changing inputs or searching for cables.

Book
The room appears in the Teams calendar and is ready for the meeting.
Join
Users tap the console instead of connecting a laptop from scratch.
Share
Content is presented clearly for both in-room and remote participants.
Reset
The room is left clean and predictable for the next meeting.
If the room regularly needs IT help before a meeting can start, the room experience has failed. Simple and repeatable use should be the benchmark.
Teams Rooms on Android or Windows?
Teams Rooms can be built around Android-based or Windows-based systems. The right choice depends on room complexity, management requirements, preferred hardware and the features your organisation needs.
For a clearer side-by-side breakdown, see the comparison on our Microsoft Teams Room solutions page.
Teams Rooms on Android
Often selected for straightforward rooms that benefit from simpler deployment and all-in-one certified devices.
Teams Rooms on Windows
Often chosen for more complex rooms, broader hardware flexibility and organisations with established Windows management processes.
How to plan Teams Rooms by space
A small focus room does not need the same AV design as an executive boardroom. Start with normal occupancy, room layout and meeting style.
Small rooms and huddle spaces
Usually suit a 43-inch or 55-inch display, an all-in-one Teams-certified video bar and a compact touch controller.
Standard meeting rooms
Often need a 65-inch or 75-inch display, stronger microphone pickup and camera coverage designed around six to twelve people.
Boardrooms
May require dual displays, a PTZ camera, ceiling microphones, dedicated speakers and a more advanced control system.
Training and multi-purpose rooms
Need flexible sharing, camera coverage and audio that can support changing layouts, workshops and hybrid sessions.
What to confirm before installation
Microsoft Teams Room FAQs
What equipment is needed for a Microsoft Teams Room?
A typical Teams Room includes a commercial display, certified camera, microphones, speakers, compute device, touch console and the necessary mounting, cabling and network connection.
Can a Microsoft Teams Room work without a laptop?
Yes. A native Microsoft Teams Room has its own dedicated compute device and joins meetings directly from the room console.
Should I choose Teams Rooms on Android or Windows?
The answer depends on room complexity, preferred hardware, management requirements and the Teams features your organisation needs.
Do I need dual displays?
Not always. Dual displays are most useful where users need to see remote participants and shared content at the same time, particularly in larger rooms and boardrooms.
Do I need professional installation?
Professional installation is recommended for anything beyond a simple plug-and-play room because mounting, cabling, networking, audio coverage and commissioning all affect reliability.
Need help building a Microsoft Teams Room?
ScreenMoove can help specify, supply and install the display, camera, microphones, speakers, control system and booking panel as one joined-up project.


