


Blog post
How to Select Touchscreen Kiosks for Business
A touchscreen kiosk that looks impressive in a showroom can quickly become a bottleneck at lunchtime, a maintenance issue in a busy reception, or an underused asset if the customer journey has not been planned properly. Knowing how to select touchscreen kiosks starts with the task they need to complete, not the screen size or the cabinet finish.
For UK businesses, the right kiosk can reduce queue pressure, improve access to information, capture leads, support wayfinding or speed up ordering. The wrong specification can mean poor visibility, slow touch response, inaccessible content and unnecessary replacement costs. This guide focuses on the commercial decisions that determine whether a kiosk works reliably in the real environment.
Start with the job the kiosk must do
A kiosk should have one clear primary purpose. In a quick-service restaurant, that may be self-ordering and payment. In a corporate reception, it may be visitor registration and badge printing. A retail store may use it for product lookup, stock checking or endless-aisle ordering, while a hospital or college may need wayfinding and appointment information.
These uses create different technical requirements. A wayfinding kiosk may need a large screen, map-led interface and an easy-to-read layout, but no printer or payment terminal. A self-service ordering kiosk requires a responsive touch display, integrated peripherals, secure payment hardware and a cabinet designed to withstand continuous public use.
Before requesting prices, define who will use the kiosk, what they need to achieve and what should happen after they use it. If users are standing for less than a minute, the interface and physical height can differ from a kiosk designed for detailed form completion. Equally, a staff-only check-in point does not necessarily need the same vandal-resistant enclosure as an unattended public installation.
How to select touchscreen kiosks by environment
The installation environment affects almost every part of the specification. Indoor, sheltered outdoor and fully outdoor kiosks are not interchangeable.
Consider light levels and screen brightness
Standard indoor commercial displays are suitable for many receptions, offices, schools and restaurant interiors. However, a kiosk positioned near glazing, under skylights or in a shop window needs considerably higher brightness to remain readable. Reflections and direct sunlight can make an otherwise good interface difficult to use.
Brightness is measured in nits. For typical indoor spaces, around 350 to 500 nits may be appropriate. Bright retail areas and locations facing daylight may require 700 nits or more. Outdoor or sun-facing applications often need high-brightness displays alongside optical bonding, anti-glare glass and temperature management.
Do not specify brightness in isolation. A high-brightness screen uses more power and generates more heat, so the enclosure, ventilation and operating temperature range must support it. For a kiosk used only during business hours, scheduled power settings can also reduce running costs.
Match the enclosure to public use
Commercial kiosk enclosures protect the display, player, cabling and any integrated devices. In public-facing locations, look closely at the quality of the steelwork, lockable access panels, cable management and the method of floor or wall fixing. A freestanding unit should be stable enough for the footfall and behaviour expected in the location.
For exposed or semi-exposed positions, check the ingress protection rating, weather resistance and operating temperature specification. If a kiosk is installed in a transport hub, leisure venue or other high-traffic setting, impact-resistant glass and tamper-resistant fixings are sensible investments.
A slim cabinet may suit a premium retail environment, but it can limit space for printers, scanners, payment devices and cooling. There is always a balance between visual impact, service access and the hardware required inside.
Choose the right screen size and orientation
Screen size should support the task, not simply fill the available floor space. Smaller kiosks, often from 15 to 22 inches, work well for check-in, ticket collection, feedback and compact product searches. A 32-inch or 43-inch display is a common choice for retail, visitor management and self-ordering, offering enough room for clear buttons, product images and accessible text.
Larger 49-inch and 55-inch kiosks are useful for wayfinding, interactive catalogues and locations where content needs to be viewed by more than one person. They do need more room around them, both for safe access and to prevent users blocking circulation routes.
Portrait orientation is popular for directories, queue management and menus because it follows natural reading patterns and uses a compact footprint. Landscape can be better for maps, comparison tables, wide product imagery and content designed for shared viewing. Confirm early that the chosen software and interface are designed for the intended orientation. Rotating a landscape layout into portrait rarely produces a professional result.
Specify touch technology for real users
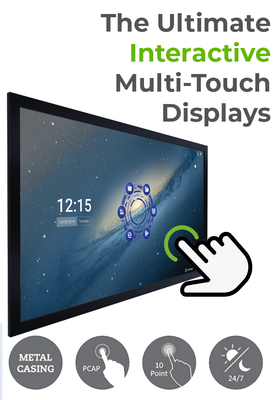
Most commercial touch kiosks use projected capacitive, or PCAP, touch technology. It offers the familiar smartphone-style response that users expect, supports multi-touch gestures and works well for the majority of indoor applications. For self-service environments, the accuracy and quick response of PCAP can materially affect transaction speed.
Infrared touch is another option, particularly on larger interactive displays. It can be suitable where users may wear gloves or where a large-format screen is required. The best choice depends on the display size, the interface design and whether the kiosk is used by the general public, staff or students.
Think about accessibility at the same time. Controls should be reachable by wheelchair users, text should be readable without leaning in, and touch targets should be large enough for people with limited dexterity. Avoid placing essential buttons close to the edge of the screen, where accidental touches are more likely. Where a kiosk supports a regulated service, seek advice on the relevant accessibility obligations before deployment.
Plan the hardware behind the screen
The display is only one part of the solution. A reliable kiosk also needs an appropriate media player or integrated PC, the correct operating system, secure network connectivity and enough processing power for the application.
A simple information kiosk may run a browser-based application from an Android or Windows player. A complex ordering or visitor management workflow may need a Windows PC, local software integration and access to printers, scanners, cameras, RFID readers or card payment terminals. Each additional device increases capability, but it also creates further points to install, test and maintain.
Ask whether the kiosk must keep working if the internet connection drops. For some applications, cached content is enough. For payment, live inventory or identity verification, you may need a resilient network design, 4G or 5G backup, and a clearly defined process for outages.
Security deserves equal attention. Public kiosks should use restricted user accounts, locked-down browser settings, automatic session clearing and protected physical access to the PC and ports. Remote device monitoring can help an IT or support team identify an offline kiosk before it becomes a customer complaint.
Include peripherals only where they improve the journey
Integrated peripherals turn a display into a working self-service station. Common requirements include receipt printers, barcode scanners, QR code readers, cameras, contactless payment terminals, NFC or RFID readers, keyboards and ticket dispensers.
The key question is whether each peripheral removes friction. A scanner makes sense for click-and-collect or membership check-in. A printer may be essential for visitor badges, but unnecessary where a digital confirmation can be sent by email or SMS. Payment integration needs early planning, as merchant providers, terminal mounting, data security and software compatibility all affect the final design.
Avoid assuming that an off-the-shelf cabinet will accept every peripheral. Confirm cut-outs, mounting brackets, cable routes, power requirements and service access before the kiosk is manufactured or delivered.
Do not treat software as an afterthought
A visually strong kiosk can still fail if the application is confusing, slow or difficult to update. Decide whether the kiosk needs a dedicated self-service application, a web-based portal, digital signage software with interactive content, or a custom interface connected to business systems.
For multi-site organisations, central content control is often essential. Teams should be able to change product information, maps, promotions or notices without visiting every location. Permission levels, scheduling, reporting and remote reboot functions are particularly valuable where kiosks form part of a wider digital signage network.
Test the user flow with real people before rollout. Watch where they hesitate, whether they understand the first screen and how long common tasks take. A kiosk should reduce the need for staff assistance, not create another queue beside the screen.
Budget for installation, support and lifecycle costs
The purchase price is only part of the commercial decision. Factor in site surveys, electrical work, data connections, floor fixing, software licences, peripheral integration, delivery, installation and ongoing support. A kiosk placed in the wrong location can require costly remedial work even if the hardware itself was competitively priced.
Commercial-grade equipment is designed for longer operating hours and repeated use, but it still needs a support plan. Establish who will clean the screen, replenish printer consumables, check payment devices, update software and respond to faults. For a national rollout, consistent installation standards and remote support can be more valuable than a small saving on individual units.
Screen Moove can help businesses assess kiosk hardware, display brightness, enclosure options, software and installation requirements as one connected project rather than a collection of separate purchases.
The best touchscreen kiosk is not necessarily the biggest screen or the most feature-packed cabinet. It is the one that lets a customer, visitor or member of staff complete a useful task quickly, clearly and reliably - while giving your team a system they can support with confidence.


